Fixing Android emulator path error on Windows
Back in 2023 I wrote a blog post about fixing an error related to Android emulators and having special characters in your Windows username. Click here to read my previous post on the subject.
The fix I suggested in that post is still valid and does the job. But the fix I’m presenting to you now is even simpler.
Background
When you’re doing cross platform app development in Visual Studio on Windows, Android emulation is done in Android Virtual Devices (AVD). The devices in their turn are handled by the Android Device Manager (ADM).
By default, the path to the folder where everything related to your AVDs is placed in:
C:\Users\{your username}\.android\avdAnd just like I wrote in my old blog post, Android doesn’t care much for special characters. In my case the scandinavian special character ‘ö’ makes things troublesome.
How do we get around this? Follow the instructions below and you’ll be emulating Android devices on your Windows machine in no time!
Step 1
Create a folder anywhere on your hard drive where there aren’t any special characters in the path. For in this example I’m going to place it on C:\ root and name it ‘AndroidAVD’.
C:\AndroidAVDStep 2
Open Control Panel > System and Security > System > Advanced system settings. Then click the “Environment Variables” button.
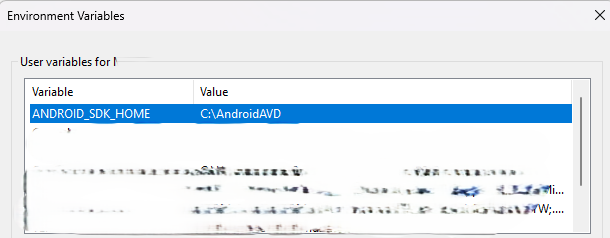
If you’ve already installed any Android virtual devices through Visual Studio, you should have a user variable named ANDROID_SDK_HOME. Edit this variable and set it’s value to the path to the folder you created in step 1. In this example, I’m going to set it to C:\AndroidAVD
By doing this you’ll point out a new place to store everything related to your Android virtual devices.
NOTICE: You can really screw things up when editing environment variables. Pay close to attention to what you’re doing and don’t touch anything if you don’t know what it is.
Step 3
Install a new Android virtual device in Visual Studio. It should run without any problems now. If needed, reboot your machine and repeat step 3.
Happy coding!