Custom tag helpers in ASP.NET Core
Tag helpers are not by any means a new feature to ASP.NET. Like HTML Helpers tag helpers enable server-side code to help in rendering HTML elements in Razor views. But they are doing this is in a more elegant, HTML-like syntax.
    <div>
        <div>
            <div>
		<!-- These two lines do the same thing -->
                @Html.LabelFor(model => model.CustomerName) <!-- HTML helper -->
                <label asp-for="CustomerName"/> <!-- Tag helper -->
            </div>
        </div>
    </div>
Looking at the example above, which one is easier to read/write? Which one blends in more smoothly with the surrounding HTML?
One of the features that came with HTML5 was the support for custom elements. This allowed custom naming of elements, helping out with creating a more semantic web.
<!-- Custom HTML element tag, by default behaving like an inline element -->
<myelement>My purdy custom element</myelement>
Now, imagine you could do this and add custom server-side logic to your custom HTML tag. This is where custom tag helpers enters the picture.
Down to the code
In this tutorial we’re going to create a custom tag helper that prints a piece of text X number of times.
Start off by creating a new ASP.NET Core MVC or Razor Pages project and naming it “TagHelperDemo”. If you’re applying this functionality to an existing project, replace all mentions of the project “TagHelperDemo” with your project name.
Step 1: Add new files
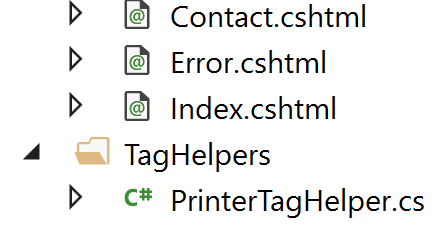
Start out by creating a folder named “TagHelpers” where you find fitting in your web project. For this tutorial, we’re going to place it on the project root.
Inside of the TagHelpers folder, create a separate C# class for every tag helper you want to create.
Make sure that your new classes ends with the suffix -TagHelper.
For this example, create a class named “PrinterTagHelper.cs”.
Step 2: Writing the code
Open the newly created class and add the following code:
using Microsoft.AspNetCore.Razor.TagHelpers; //Add this namespace

public class PrinterTagHelper : TagHelper //Class must inherit from TagHelper
{
    //Properties will become HTML attributes of your new tag helper
    public string Text { get; set; }
    public int Number { get; set; }

    //Override the virtual method Process from TagHelper
    public override void Process(TagHelperContext context, TagHelperOutput output)
    {
        //Write your custom logic here
        for (int i = 0; i < Number; i++)
        {
            output.Content.AppendHtml($"{Text}</br>");
        }
    }
}
Next, we need to import our new tag helper into our views. You can either choose to do this view by view where the tag helper is needed, or by registering the tag helper in _ViewImports. This imports the tag helper into all views in the project.
Open Views/_ViewImports.cshtml (Pages/_ViewImports.cshtml if using Razor Pages) and add the following:
//Import the default tag helpers
@addTagHelper *, Microsoft.AspNetCore.Mvc.TagHelpers
//Import all tag helpers in TagHelpers folder
@addTagHelper TagHelperDemo.TagHelpers.*, TagHelperDemo

//Optionally, import specific tag helpers by name
@addTagHelper TagHelperDemo.TagHelpers.PrinterTagHelper, TagHelperDemo
Step 3: Using your custom tag helper
Open up the view where you want to use your tag helper and add the following:
Notice that this HTML tag has the same name as the prefix of your custom tag helper class and that the properties you assigned it are represented as attributes to the tag. All with standardized HTML casing out of the box!
The tag behaves as any other tag. You can set ID and class attributes just as you would on any other type of tag.
It even has intellisense!
Step 4: Lo and behold
Run your application and navigate to the view(s) where you imported and implemented your custom tag helper. The string you set as value in the Text attribute should now be printed the number of times you set as value in the Number attribute.
Step 5: Get creative
Pretty much everything you can do with Razor syntax in a view can be done in a tag helper, but without the added clutter to your views that comes with Razor.
You can for instance easily add child elements and logic for whether they shall be rendered or not.
public override void Process(TagHelperContext context, TagHelperOutput output)
{
    if (Number > 0)
    {
        for (int i = 0; i < Number; i++)
        {
            output.Content.AppendHtml($"{Text}</br>");
        }
    }
    else
    {
        output.Content.AppendHtml("<h1>Number must be greater than zero!</h1>");
    }
}
Code examples for the above tutorial are available here.


